Thursday, November 21, 2024

How to Build a Durable DIY Pallet Shed: Affordable Plans for Your Yard

How to Build a Durable DIY Pallet Shed: Affordable Plans for Your Yard

How to Build a Durable DIY Pallet Shed: Affordable Plans for Your Yard

Tired of overflowing garages and cluttered yards? Dreaming of a dedicated space for your gardening tools, outdoor equipment, or extra storage? Building a DIY pallet shed is a fantastically affordable and surprisingly easy solution. This guide provides detailed, step-by-step instructions to construct a sturdy, weather-resistant shed using repurposed pallets, saving you a significant amount of money while minimizing your environmental impact. Get ready to transform your outdoor space!

Planning Your Pallet Shed: Size and Location

Before you dive into construction, carefully plan your shed's size and location. Consider the amount of storage you need, ensuring adequate space for your intended items. Measure the area you've chosen, considering access for construction and future use. Ideal locations offer level ground, good drainage to prevent water damage, and proximity to a power source if needed. Sketch a simple design incorporating your desired dimensions. This initial planning phase will prevent costly mistakes later on.

Gathering Your Materials: Sourcing Pallets and Essentials

The heart of your project lies in sourcing pallets. Inspect many pallets carefully before selecting the best ones for your shed. Look for pallets made of sturdy wood, free from rot, excessive damage, or loose nails. You'll need a significant number, depending on your shed's size. Consider the dimensions of each pallet to plan your wall layout efficiently. Beyond the pallets, gather these essential supplies:

  • Heavy-duty screws (exterior grade)
  • Hammer and nail puller (for removing damaged nails)
  • Measuring tape and level
  • Circular saw or hand saw
  • Drill and drill bits
  • Safety glasses and work gloves
  • Post hole digger or auger (for setting posts, if needed)
  • Concrete mix (for setting posts, if needed)
  • Plywood or OSB (for roofing and flooring)
  • Roofing felt or other suitable roofing material
  • Exterior-grade paint or sealant (optional)

Building the Foundation: Creating a Solid Base

A stable foundation is crucial for a durable shed. You have several options: You can simply build directly on level compacted ground, using pallets to create a raised floor. Alternatively, consider creating a simple concrete slab, or construct a more substantial base using treated lumber. For a raised floor, place landscape fabric under the pallets to prevent weed growth. For a concrete slab foundation, follow the manufacturer’s instructions on mixing and pouring the concrete, ensuring a perfectly level surface.

Constructing the Walls and Roof: Assembling Your Pallet Structure

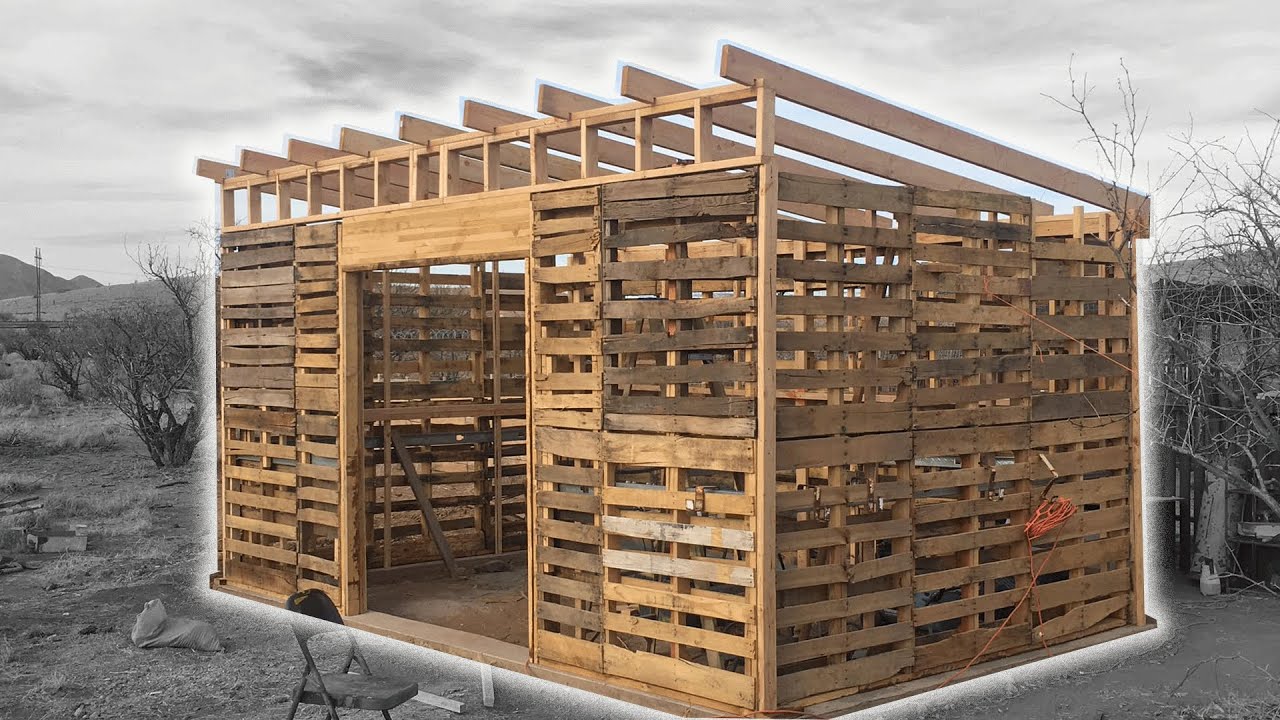
Begin assembling the walls using your chosen pallets. Carefully inspect each pallet, cleaning and repairing any damaged areas. Secure pallets together using heavy-duty screws, creating a strong and even structure. Consider adding vertical bracing for added support. Once the walls are complete, carefully raise them into position, ensuring they're plumb and square. Connect the walls securely at the corners. Next, build the roof frame using additional lumber or by creatively repurposing pallets. Cover the roof frame with plywood or OSB, followed by your chosen roofing material for waterproofing.

Finishing Touches: Adding the Finishing Details

Once your roof is in place, add your chosen flooring material, ensuring proper drainage if you've built a raised floor. Secure the floor with screws. You can paint or seal the exterior of your pallet shed for added weather protection and aesthetic appeal. Consider adding a door using more pallets or by purchasing a pre-made door. Remember, you can customize your shed with additional features like windows or shelves. Enjoy your new DIY pallet shed!

How to Build a Small Pallet Shed: Quick and Easy DIY Guide

How to Build a Small Pallet Shed: Quick and Easy DIY Guide

How to Build a Small Pallet Shed: Quick and Easy DIY Guide

Hey there, fellow DIY enthusiasts! So you're thinking about building a small shed, but the thought of lumber yards and complex plans is making your eyes glaze over? Don't worry, you're not alone! That's why I'm here to show you how to build a charming little shed using reclaimed pallets â€" a super budget-friendly and surprisingly satisfying project. This guide is designed to be super straightforward, so even if you're a complete beginner, you can totally tackle this. Let’s get started!

Gathering Your Materials: The Foundation of Your Pallet Shed

Before you even think about hammering a nail, you need to gather your supplies. The beauty of using pallets is that a lot of it might already be lying around, waiting to be repurposed! But let's go through the essentials:

The Star of the Show: Reclaimed Pallets

You'll need a good number of pallets, depending on the size of the shed you envision. I recommend looking for sturdy pallets â€" ones that aren't too rotted or damaged. Aim for pallets that are relatively clean and free of nails sticking out at dangerous angles. Think about the size of your shed; you might need 6-10 pallets, depending on the dimensions. You can often find free pallets from construction sites, businesses, or even on Craigslist or Facebook Marketplace â€" just be sure to ask permission before taking any!

Essential Tools: Your Arsenal for Shed Success

You won't need a huge arsenal of tools, but a few key ones will make the process much smoother:

  • Hammer
  • Crowbar or pry bar (for separating pallet boards)
  • Screwdriver (preferably both Phillips and flathead)
  • Measuring tape
  • Level
  • Safety glasses (absolutely crucial!)
  • Work gloves (protect those hands!)
  • Saw (circular saw or hand saw â€" a circular saw will be faster and easier)
  • Drill (optional, but highly recommended for speed and accuracy)
  • Nails or screws (depending on your preference and pallet condition)

Optional but Helpful Extras:

These aren't strictly necessary, but they'll make your life easier and the shed look nicer:

  • Exterior wood stain or paint
  • Pressure treated wood for the base (if you want a more permanent solution)
  • Roofing felt or metal roofing sheets
  • Hinges for a door
  • A latch or lock

Building the Foundation: A Strong Start

Before you start stacking pallets, you need a solid base. This can be as simple as a compacted gravel base or, for a more permanent structure, a simple platform made from pressure-treated lumber. If you're going the simple route, make sure the ground is level and clear of any debris.

Important Note: If you're building on a sloped area, consider leveling the ground or creating a stepped base to ensure stability.

Constructing the Walls: Pallet by Pallet

Now for the fun part! Start by carefully disassembling your pallets. Use your crowbar to gently separate the boards, being careful not to damage them too much. You'll want to assess the condition of the wood; some boards might be too damaged to use, while others will be perfect!

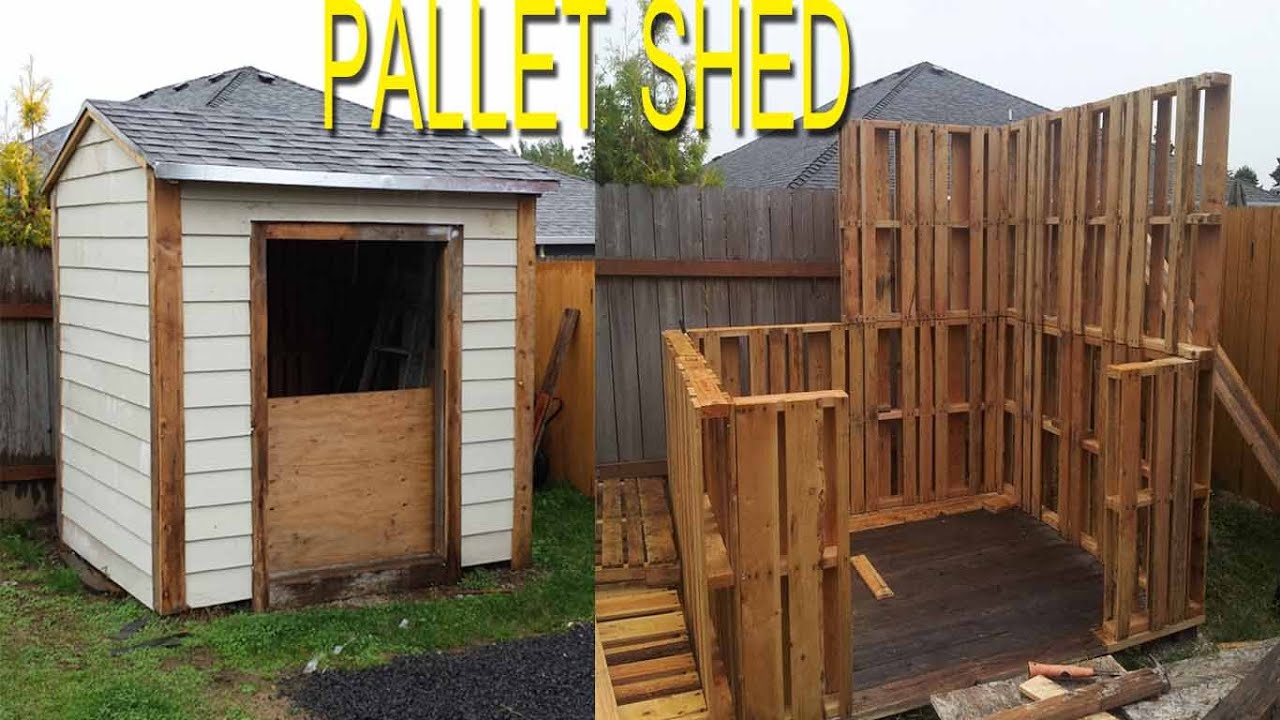
Once you have a good supply of usable boards, start assembling the walls. You can either build the walls directly on the base or assemble them separately and then attach them to the base. If you are making a small shed (let's say 4ft x 4ft) you may only need a couple of walls. You can use remaining pallets to build the small back, front, and one side.

Tip: Use longer boards for corner supports and make sure your walls are plumb (perfectly vertical) using your level. You can use longer boards as vertical supports between the pallets for extra stability.

Adding the Roof: Shelter from the Storm

The roof is crucial for protecting your belongings. You have a few options here. The simplest is a single-sloped roof. You can use more pallet wood, or consider using inexpensive roofing felt or even metal roofing sheets for a more weather-resistant solution. If you're using pallet wood, ensure it's treated or sealed to withstand the elements.

Important Consideration: Make sure your roof has enough slope to allow water to run off easily. A slight angle is better than a flat roof.

Finishing Touches: The Extra Mile

Once your walls and roof are up, you can add some finishing touches. This is where you get to personalize your shed. Consider:

  • Adding a door: Use more pallet wood or buy a pre-made door. Make sure to add hinges and a latch.
  • Painting or staining: A fresh coat of paint or stain will protect the wood and give your shed a more polished look. Choose exterior-grade paint or stain to withstand the weather.
  • Adding shelves: Use more reclaimed wood to create simple shelves inside the shed for storage.

Safety First!

Throughout this process, remember safety is paramount. Wear your safety glasses to protect your eyes from flying debris, and always use caution when handling tools. If you're unsure about any step, it's always better to ask for help or do some additional research before proceeding.

Commonly Asked Questions

Here are some frequently asked questions to help you on your shed-building journey:

Q: How long does it take to build a pallet shed?

A: The time it takes depends on your experience and the size of your shed. A small shed can be built in a weekend, but a larger one might take longer.

Q: How much does it cost to build a pallet shed?

A: The cost is mainly determined by the materials you need to buy. If you can find free pallets, the cost could be minimal. However, you might need to purchase additional materials like screws, hinges, paint, and roofing materials, which could cost anywhere between $50-$200 depending on your choices.

Q: Are pallet sheds durable?

A: The durability depends on the quality of the pallets you use and how well you construct the shed. Using sturdy pallets, proper construction techniques, and applying a protective sealant will significantly improve the longevity of your shed.

Q: What kind of permits do I need?

A: This depends on your local regulations. Small sheds often don’t require permits, but it’s always best to check with your local building department to avoid any potential issues.

Q: Can I use treated lumber for the base?

A: Yes, using pressure-treated lumber for the base is a good idea. It protects the shed from moisture and increases its lifespan significantly.

There you have it! Your complete guide to building a small pallet shed. Remember, this is a fun project, so don't be afraid to get creative and make it your own! Happy building!

How to Build a Lean-To Shed: A Beginner’s Guide to Shed Construction

How to Build a Lean-To Shed: A Beginner’s Guide to Shed Construction

How to Build a Lean-To Shed: A Beginner’s Guide to Shed Construction

Constructing a lean-to shed offers a practical and relatively straightforward approach to expanding your outdoor storage space. This guide provides a comprehensive, step-by-step approach for beginners, detailing the process from initial planning to final finishing touches. While experience is beneficial, careful planning and adherence to these instructions will enable even novice builders to successfully complete this project.

I. Planning and Preparation: Laying the Foundation for Success

Before initiating construction, meticulous planning is crucial. This phase ensures efficiency, minimizes errors, and maximizes the longevity of your lean-to shed.

A. Determining Shed Dimensions and Location

The dimensions of your lean-to will be dictated by your available space and storage requirements. Consider the length and width necessary to accommodate your intended contents. Accurate measurements are paramount. Careful consideration should be given to the location; ensure adequate clearance from neighboring structures and utilities. The chosen location should also provide suitable drainage to prevent water accumulation around the base of the shed.

B. Obtaining Necessary Permits and Approvals

Depending on your location, building permits may be required before commencing construction. Contact your local building department to determine the specific regulations and obtain the necessary approvals. Failure to obtain the required permits can result in fines or legal complications. Consult your homeowner’s association if applicable for any restrictions on shed construction.

C. Gathering Materials and Tools

A detailed materials list is indispensable. This list will prevent unforeseen delays during the construction process. Ensure you have sufficient quantities of:

  • Pressure-treated lumber for the frame (4x4 posts, 2x4 or 2x6 for framing)
  • Plywood or OSB sheeting for the walls and roof
  • Roofing material (shingles, metal, etc.)
  • Concrete mix or other suitable foundation material
  • Nails, screws, and other fasteners
  • Exterior paint or stain (optional)
  • Door hardware (if applicable)

Necessary tools include:

  • Measuring tape and level
  • Shovel and post-hole digger (if applicable)
  • Circular saw or hand saw
  • Drill and driver
  • Hammer
  • Safety glasses and work gloves

II. Foundation Construction: Building a Stable Base

A robust foundation is essential for a stable and durable lean-to shed. The choice of foundation depends on the soil conditions and local regulations.

A. Preparing the Ground

Clear the designated area of any vegetation, debris, or loose soil. Level the ground to create a firm and even base for your foundation. Ensure proper drainage is in place to prevent water damage to the shed.

B. Foundation Construction Options

Several foundation options exist, including:

  • Concrete Slab: Provides a durable and level base. Requires mixing and pouring concrete, followed by curing time.
  • Gravel Base: A simpler and less expensive option. Involves laying down a layer of compacted gravel to provide drainage and a level surface. This approach is suitable for lighter-weight lean-tos.
  • Pier and Beam Foundation: Ideal for uneven terrain. Involves setting concrete piers or posts at regular intervals and attaching the floor joists to these piers.

C. Securing the Base Framing

Once the foundation is complete, attach the base framing to it. This typically involves pressure-treated lumber laid on the foundation and secured with appropriate fasteners. Ensure that the framing is level and square.

III. Frame Construction: Erection of the Wall and Roof System

Constructing the frame involves assembling the wall and roof structures. Accuracy is vital at this stage.

A. Erecting the Walls

Using pressure-treated lumber, construct the wall frames. Ensure vertical alignment and proper spacing for wall sheathing. For added strength, consider using corner bracing. Attach the wall frames to the base framing.

B. Constructing the Roof Frame

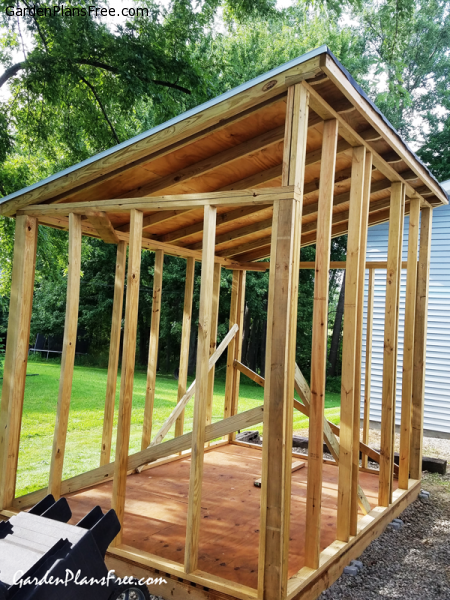
The roof frame is typically supported by rafters attached to the top plates of the wall frames and to a ridge beam. Carefully measure and cut rafters to the appropriate length and angle to ensure proper slope and drainage. Ensure the rafters are properly spaced and secured.

C. Sheathing the Walls and Roof

Attach plywood or OSB sheeting to the wall and roof frames. Ensure proper overlapping and alignment of sheathing panels. Use appropriate nails or screws for secure attachment. Consider using weather-resistant sheathing for improved durability.

IV. Roofing and Finishing: Completing the Shed Structure

This final stage involves installing the roofing material and adding finishing touches to enhance the shed’s appearance and functionality.

A. Installing Roofing Material

Install the chosen roofing material according to the manufacturer’s instructions. Ensure proper overlapping and sealing of the roofing material to prevent leaks. Consider using roofing underlayment for added protection.

B. Adding Doors and Windows (Optional)

If desired, install doors and windows, ensuring proper sealing and weatherproofing. Use appropriate hardware for secure and smooth operation.

C. Painting or Staining (Optional)

Apply exterior paint or stain to protect the lumber from weathering and enhance the aesthetic appeal of the shed. Allow sufficient drying time before storing items inside.

V. Safety Precautions

Safety should be prioritized throughout the construction process. Always wear appropriate safety gear, including safety glasses and work gloves. Use caution when operating power tools and follow all manufacturer's instructions. Ensure proper lifting techniques to prevent injuries. If working at heights, utilize appropriate safety measures, such as scaffolding or ladders.

Building a lean-to shed is a rewarding project that enhances your property and provides valuable storage space. By following these instructions carefully and prioritizing safety, even a beginner can successfully complete this project. Remember to always consult local building codes and regulations before commencing construction.

DIY Lean-To Shed: Budget-Friendly Plans for an Easy Shed Build

DIY Lean-To Shed: Budget-Friendly Plans for an Easy Shed Build

DIY Lean-To Shed: Budget-Friendly Plans for an Easy Shed Build

Tired of cluttered garages and overflowing storage spaces? Yearning for a simple, affordable solution to your storage woes? Building your own lean-to shed is a surprisingly achievable project, even for novice DIYers. This guide provides detailed, budget-friendly plans to help you construct a functional and attractive lean-to that perfectly complements your property, all while saving you a significant amount of money compared to purchasing a pre-fabricated shed.

Planning Your Lean-To Shed

Before you grab a hammer, careful planning is essential. First, determine the ideal location for your lean-to. Consider proximity to existing structures (like a house or garage) for easy access and utilize existing walls to minimize construction costs. Measure the available space meticulously to determine the dimensions of your shed. You’ll need to decide on the overall length and width, and the height of the roofline. Remember to check local building codes and regulations before you start, ensuring your lean-to adheres to all necessary permits and safety standards. Sketch a simple design, noting the materials needed based on your chosen dimensions. This planning stage will prevent costly mistakes and ensure a smoother build.

Choosing Your Materials

Opting for cost-effective materials is key to a budget-friendly build. Pressure-treated lumber offers durability and resistance to rot, making it ideal for the frame. Consider using recycled or reclaimed lumber where possible to further reduce expenses. For roofing, choose a budget-friendly option like asphalt shingles or corrugated metal sheeting. Don't forget essential fasteners like screws, nails, and brackets. Creating a detailed materials list, including quantities, will help you stick to your budget and prevent unexpected trips to the hardware store.

Building Your Lean-To Shed: A Step-by-Step Guide

With your plans finalized and materials gathered, you’re ready to begin construction. Start by preparing the ground. Level the area where your shed will be built, removing any debris or vegetation. Next, construct the base. This can be as simple as a concrete slab, gravel base, or a treated lumber platform. Next, build the frame. Begin by constructing the support posts, securely anchoring them to the ground and to the existing structure. Then, attach the horizontal beams to create the frame's structure, ensuring everything is level and square. This step is crucial for the stability of your lean-to.

Roof Construction and Finishing Touches

Once the frame is complete, install the roofing material according to the manufacturer’s instructions. This often involves laying down underlayment, followed by the shingles or sheeting. Consider adding gutters to manage rainwater efficiently. Finally, add any desired finishing touches. This could involve painting or staining the lumber for protection and aesthetics, adding a simple door, or installing shelving for extra organization. Remember to double-check all connections and ensure the structure is stable and secure before celebrating your finished project.

Tips for Keeping Costs Down

  • Source materials wisely: Shop around for the best prices, consider buying in bulk, and look for sales and discounts.
  • Utilize existing resources: Leverage existing walls or structures to minimize material needs.
  • Enlist help: Ask friends or family to assist with the construction to save on labor costs.
  • Prioritize essential features: Focus on functionality over luxury features to keep the project affordable.
  • Recycle and repurpose: Use salvaged or reclaimed materials wherever possible.

Building a lean-to shed is a rewarding project that can significantly enhance your property’s functionality and value. By following these budget-friendly plans and tips, you can create a practical and attractive storage solution without breaking the bank. Remember safety first, take your time, and enjoy the process of bringing your DIY vision to life!

DIY Pallet Shed Plans for Quick and Easy Backyard Construction

DIY Pallet Shed Plans for Quick and Easy Backyard Construction

DIY Pallet Shed Plans for Quick and Easy Backyard Construction

The allure of a functional yet aesthetically pleasing backyard shed is undeniable. However, the cost of professionally constructed sheds can be prohibitive. This comprehensive guide offers detailed plans for constructing a robust and attractive shed using reclaimed pallets, minimizing cost and environmental impact while maximizing practicality and ease of construction. This project is suitable for individuals with basic DIY skills and readily available tools.

Phase 1: Planning and Preparation

Before embarking on any construction project, meticulous planning is paramount. This phase involves defining the shed's dimensions, sourcing materials, and securing necessary permits (if required by local regulations).

1.1 Defining Shed Dimensions and Functionality

The first step involves determining the desired dimensions of your pallet shed. Consider the intended use â€" storage of gardening tools, bicycles, or other equipment. A smaller shed (e.g., 6ft x 4ft) may suffice for limited storage, while larger structures (e.g., 8ft x 8ft or larger) offer greater capacity. Remember to factor in the size of the pallets you intend to utilize; pallet dimensions vary significantly. Accurate measurements are crucial for efficient material planning and construction.

1.2 Sourcing and Assessing Pallets

The foundation of this project rests on the availability of suitable pallets. Source pallets responsibly. Avoid pallets that show signs of significant damage, rot, or pest infestation. Inspect each pallet for broken slats, loose nails, and any potential structural weaknesses. Prioritize heat-treated pallets (marked with HT or ISPM15) as these are less likely to harbor pests. Determine the number of pallets needed based on your shed's dimensions and the structural requirements outlined later in the plan.

1.3 Essential Tools and Materials

Before commencing construction, assemble the necessary tools and materials. This comprehensive list ensures a smooth and efficient building process:

  • Reclaimed pallets (sufficient quantity based on shed dimensions)
  • Measuring tape and level
  • Hammer and claw hammer
  • Screwdriver (or drill with screwdriver bits)
  • Safety glasses and work gloves
  • Circular saw or hand saw (for cutting pallets)
  • Safety glasses and ear protection
  • Post hole digger or auger (for foundation)
  • Concrete mix (for foundation â€" optional)
  • Wood screws (exterior grade, various lengths)
  • Nails (various sizes)
  • Wood preservative and sealant
  • Roofing felt or other suitable roofing material
  • Optional: Hinges, latch, and other hardware for the door

Phase 2: Foundation and Base Construction

A sturdy foundation is critical for a long-lasting shed. While a simple base may suffice for smaller sheds, larger structures benefit from a more robust foundation.

2.1 Preparing the Site

Choose a level area for your shed, ensuring sufficient space for construction and access. Clear the area of debris, vegetation, and any obstructions. Mark out the dimensions of your shed's base using stakes and string.

2.2 Building the Foundation

There are several foundation options: a simple gravel base, concrete blocks, or a poured concrete slab. A gravel base is the easiest and cheapest but may not offer optimal stability. For a more robust foundation, consider using concrete blocks or pouring a concrete slab. The choice depends on the size and weight of the shed and the ground conditions. Ensure the foundation is level before proceeding with the wall construction.

2.3 Assembling the Base Frame

Construct the base frame using sturdy pallets or individual pallet planks. This frame serves as the base for the shed's walls and provides added stability. Ensure the frame is square and level, making necessary adjustments as needed. Secure the frame using wood screws or nails. Consider pre-treating the wood with a preservative to protect against rot and insects.

Phase 3: Wall and Roof Construction

The walls and roof form the structure of the shed. Careful planning and precise assembly are crucial for ensuring stability and weather resistance.

3.1 Erecting the Walls

Assemble the walls using reclaimed pallets. Ideally, arrange the pallets vertically to maximize strength. Secure the pallets to the base frame using wood screws. Ensure vertical alignment and stability. Use additional bracing or supports where necessary, particularly at corners and other stress points. Consider reinforcing weak areas of the pallets with additional wood or metal brackets.

3.2 Constructing the Roof

The roof design can be simple, using a gable or shed roof style. A gable roof (triangular) offers better water runoff, while a shed roof (sloping) is easier to construct. For a gable roof, construct two triangular frames using sturdy pallet wood or other suitable lumber. For a shed roof, construct a single sloping frame. Cover the roof frame with roofing felt or other suitable roofing material to ensure waterproofing.

3.3 Adding Doors and Windows (Optional)

If desired, incorporate a door and/or windows into your shed design. This requires careful planning and accurate measurements. Use sturdy wood for the door frame and ensure the door hinges and latch mechanism are securely attached. Windows can be added using reclaimed window frames or by cutting openings in the pallets and installing plexiglass or other suitable glazing material.

Phase 4: Finishing Touches and Maintenance

Once the structure is complete, focus on finishing touches and long-term maintenance.

4.1 Sealing and Finishing

Apply a wood preservative and sealant to protect the wood from moisture, insects, and UV degradation. This step enhances the lifespan of the shed and improves its aesthetic appeal. Allow sufficient drying time before storing items inside.

4.2 Regular Maintenance

Regular maintenance is crucial for the longevity of your pallet shed. Inspect the structure periodically for signs of damage or deterioration. Repair or replace damaged components promptly. Clean the shed regularly to remove debris and prevent moisture buildup. Reapply the sealant as needed to maintain protection against the elements.

Building a DIY pallet shed is a rewarding project that allows for creativity and customization. While this guide provides a detailed framework, remember to adapt the plans to your specific needs and resources. Safety should remain your paramount concern throughout the project. Always use appropriate safety equipment and follow best practices for safe woodworking.

Make a Small Pallet Shed for Outdoor Use with These Simple Plans

Make a Small Pallet Shed for Outdoor Use with These Simple Plans

Build Your Own Charming Pallet Shed: A Simple Guide

Tired of garden clutter taking over your yard? Dreaming of a stylish, yet functional outdoor storage solution? Look no further! This guide will walk you through building a charming and surprisingly sturdy pallet shed, perfect for storing tools, gardening supplies, or even your favorite outdoor toys. Using readily available and cost-effective reclaimed pallets, you'll craft a unique addition to your outdoor space that boasts both practicality and rustic appeal.

Gathering Your Supplies and Tools

Before you begin, ensure you have all the necessary materials and tools. This project prioritizes simplicity and affordability, utilizing readily available resources. Safety first! Always wear appropriate safety gear, including gloves and eye protection. You'll need:

  • Four to six reclaimed pallets in good condition (inspect carefully for splinters and rot)
  • A sturdy base, either concrete slabs or a pressure-treated wooden frame
  • Wood screws of appropriate length (at least 2.5 inches)
  • A drill with a screwdriver bit
  • A hammer
  • A measuring tape and level
  • Optional: Exterior-grade wood paint or sealant for weather protection and aesthetic enhancement
  • Optional: Hinges and a simple latch for a door

Constructing the Shed's Frame

Laying the Foundation

Begin by preparing your base. If using concrete slabs, ensure they are level and provide a solid, stable foundation. For a wooden frame, construct a rectangle using pressure-treated lumber to match the dimensions of your pallets. Secure the frame tightly using screws.

Assembling the Walls

Carefully position your pallets on the prepared base. You might need to adjust the spacing to fit your desired shed size. Secure the pallets to each other and the base using wood screws. Focus on creating strong vertical and horizontal connections to ensure stability. Remember to pre-drill pilot holes to prevent the wood from splitting.

Adding a Roof (Optional)

For extra protection from the elements, consider adding a simple roof. You can achieve this using additional pallets, laying them flat across the top of your structure and securing them to the wall pallets. Alternatively, you could use plywood or corrugated metal sheets for a more durable roof. Secure the roof firmly to prevent movement in windy conditions.

Finishing Touches and Personalization

Once the basic structure is complete, personalize your shed! Add a simple door using more pallet wood and hinges. Secure a latch for added security. If desired, apply an exterior-grade paint or sealant to protect the wood from weathering and enhance the aesthetic appeal. Consider adding a small window for ventilation or decorative purposes. Let your creativity shine and make this shed uniquely yours!

With a little effort and these simple instructions, you'll transform discarded pallets into a functional and charming outdoor shed. Enjoy your new storage space and the satisfaction of a project well done!

Build a Custom Wooden Pallet Shed with These Easy-to-Follow Plans

Build a Custom Wooden Pallet Shed with These Easy-to-Follow Plans

Build Your Own Custom Wooden Pallet Shed: A Step-by-Step Guide

Hey there, fellow DIY enthusiasts! So you're thinking about building a shed, huh? Smart move! A shed is incredibly useful, whether you need extra storage space, a workshop, or just a quiet place to escape. And what's even better than a regular shed? A *pallet* shed! Using reclaimed pallets is a super budget-friendly and eco-conscious way to build something amazing. This guide will walk you through building your own custom wooden pallet shed, step by step. Get ready to roll up your sleeves and get your hands dirty â€" this is gonna be fun!

Planning Your Pallet Shed Paradise

Before we even think about hammering a nail, we need a plan. This isn't brain surgery, but a little forethought will save you headaches (and possibly some wood!).

Choosing Your Pallets

This is the fun part! Finding your pallets. Ideally, you want pallets that are in good condition â€" sturdy and free of rot or major damage. Check your local hardware stores, construction sites (always ask permission!), or even online classifieds. Remember to check for any markings indicating the type of wood and treatment â€" heat-treated is generally preferred for outdoor projects. You'll need to assess how many you need based on your desired shed size. Bigger shed = more pallets. Seems obvious, but you'd be surprised!

Designing Your Shed: Size and Style

Think about the size you need. How much stuff are you planning to store? A small shed is perfect for tools and garden equipment, while a larger one might be better for a workshop or storing larger items. Consider the style too! Do you want a simple, rustic look or something more elaborate? Sketch out your ideas â€" even a rough drawing will help. Remember to factor in the size of the pallets you've found â€" this will influence your overall design.

Gathering Your Materials & Tools

Once you've got your pallets, it's time to gather the rest of your materials. You'll need:
  • More pallets (duh!)
  • Strong screws â€" exterior-grade is best
  • A drill with appropriate drill bits
  • A hammer (always handy)
  • A level â€" essential for straight walls!
  • Measuring tape
  • Safety glasses (protect those peepers!)
  • Work gloves (save your hands!)
  • Optional: Wood sealant or paint for weather protection
  • Optional: Roofing material (e.g., corrugated metal, tarps)

Construction Time!

Alright, let's build! This is where the real fun begins. Remember, safety first! Always wear safety glasses and gloves.

Building the Floor

Start with the floor. Lay out your pallets to create the desired floor size. Use screws to fasten them together securely. Make sure the floor is level. This is crucial for a stable shed.

Constructing the Walls

Next, build the walls using more pallets. You can arrange them vertically or horizontally depending on your design. Remember to check for levelness as you go. Use plenty of screws to ensure sturdy construction. For added stability, you might consider using longer pieces of wood to create corner supports.

Putting it All Together

Once the walls are built, carefully lift them into place and secure them to the floor. You might need a helper for this step! Add bracing between the walls for extra strength. Think of this like building a box, but a really cool, rustic-looking box.

Adding a Roof

This is where you get creative! You can use more pallets for a simple, flat roof. However, for better weather protection, you might consider using corrugated metal or even tarps. Secure your roofing material firmly to the top of the walls. Make sure it’s properly sealed to protect your shed from the elements.

Adding a Door (optional)

If you want a door, you'll need to cut an opening in one of the walls. This might require a saw, and you can always use some additional pallet wood to create a door frame and then use pallet wood to create the door itself. You can get creative here and add hinges and a latch!

Finishing Touches and Maintenance

Congratulations! You've built your own pallet shed! Now let's add the finishing touches.

Weatherproofing

To protect your hard work, consider applying a wood sealant or paint to the pallets. This will help them withstand the elements and prolong the life of your shed.

Personalization

Now for the fun part: personalization! Add your own touch to the shed. You can add shelves, hooks, or even paint it a fun color. Let your creativity shine!

Commonly Asked Questions

Q: Are all pallets safe to use?

A: No. Some pallets are treated with chemicals that aren't safe for outdoor use. Look for heat-treated pallets (marked with HT or ISPM 15) for a safer option.

Q: How long will a pallet shed last?

A: With proper construction and weatherproofing, a pallet shed can last for several years. The lifespan depends on the quality of the pallets and the climate.

Q: Do I need any special permits to build a shed?

A: Possibly. Check your local building codes and regulations. Small sheds may not require permits, but it's always best to be sure.

Q: What if I don't have any carpentry skills?

A: Don't worry! Building a pallet shed is a great way to learn basic carpentry skills. There are tons of online tutorials and videos that can guide you through each step.

Q: Can I use different types of pallets?

A: Yes, but always inspect the pallets carefully before using them. Make sure they are sturdy and free from rot or damage.

And there you have it! Your very own custom wooden pallet shed. Enjoy your new storage space (and the sense of accomplishment!). Remember, this is just a guide â€" feel free to get creative and personalize your shed to suit your needs and style. Happy building!

How to Build a Lean-To Shed That’s Simple, Affordable, and Useful

How to Build a Lean-To Shed That’s Simple, Affordable, and Useful

Building Your Own Simple & Affordable Lean-To Shed: A Weekend Warrior's Guide

So, you're dreaming of a little extra storage space, a workshop haven, or maybe just a cozy spot to escape? Building a lean-to shed is a fantastic project for anyone who wants a practical structure without breaking the bank or requiring advanced carpentry skills. This guide will walk you through building your own, focusing on simplicity, affordability, and â€" most importantly â€" making it a fun and achievable experience!

Planning Your Lean-To Shed: Dream Big, Start Small

Before you even think about grabbing a hammer, let's get the planning sorted. This isn't rocket science, but a little prep work goes a long way.

Choosing Your Location and Size

Think about where your lean-to will go. You'll need a sturdy wall to lean it against â€" your house, a garage, a barn, whatever's available. Measure the available wall space carefully. Remember, bigger isn't always better, especially for a first-timer. A smaller shed (say, 6ft x 8ft) is easier to manage and quicker to build.

Materials List: Keeping it Budget-Friendly

This is where you can really save money. You don't need fancy, expensive lumber. Pressure-treated lumber is a good choice for the floor and base because it resists rot. For the rest, regular lumber works perfectly fine. Consider scavenging for reclaimed materials â€" often you can find great deals (or even free!) wood on Craigslist, Facebook Marketplace, or even at local construction sites. Here's a basic list (quantities will vary based on your shed size):

  • Pressure-treated lumber for the base and floor
  • Regular lumber for the walls and roof
  • Plywood for the roof sheathing
  • Roofing material (tar paper, asphalt shingles, corrugated metal â€" choose what fits your budget and aesthetic)
  • Nails, screws, and other fasteners
  • Post anchors or concrete (if needed for extra stability)
  • Level, measuring tape, saw, hammer, drill

Pro-Tip: Create a detailed list with specific quantities based on your measurements. This avoids costly trips back to the hardware store.

Construction: A Step-by-Step Guide

Alright, let's get building! Remember, safety first. Wear safety glasses, work gloves, and sturdy shoes. If you’re using power tools, familiarize yourself with their safety features.

Laying the Foundation

This is where your pressure-treated lumber comes into play. Build a simple frame on the ground, the same size as your shed's footprint. This frame acts as your base and will keep the floor level and prevent rot. Secure it with screws and make sure it’s level. If you're building on uneven ground, you may need to adjust the height of the base frame.

Building the Floor

Once the base is solid, attach your floorboards to the frame. Use pressure-treated lumber for this as well. Leave a small gap between the boards for expansion and contraction. This helps prevent warping and cracking.

Constructing the Walls

For a simple lean-to, you'll need just two walls. Cut your lumber to the correct height (consider adding a slight overhang for a little extra roof coverage). Assemble these walls using screws or nails, ensuring they are square and plumb. Remember to leave openings for doors or windows if you plan on having any. You can get creative here, but keep it simple. A single door often suffices.

Putting Up the Roof

This is the most important part. You’ll need to create a sloped roof to allow for proper water runoff. This can be a simple design â€" just a couple of angled rafters resting on the supporting wall and the top of your walls. Cover the rafters with plywood sheathing. Finally, install your chosen roofing material (asphalt shingles are a popular, budget-friendly choice). Remember to overlap the roofing material to prevent leaks.

Adding the Finishing Touches

Once the roof is on, you can add a simple door and any windows you’ve planned for. Consider adding some simple trim to neaten up the edges. A coat of exterior paint or stain will add protection and enhance the look. You can also add simple shelving inside to maximize your storage space.

Tips for Keeping Costs Down

Building a lean-to shed on a budget is achievable! Here are some money-saving tips:

  • Use reclaimed materials: Look for free or discounted wood on Craigslist, Facebook Marketplace, or at local construction sites.
  • Choose affordable roofing materials: Tar paper or corrugated metal are cheaper than asphalt shingles, although asphalt shingles offer a more traditional look.
  • Buy in bulk: Purchasing materials in larger quantities can often save you money.
  • Borrow tools: If you don't own all the necessary tools, see if you can borrow them from friends or family, or rent them from a hardware store.
  • Do the work yourself: This is the biggest cost saver! Building it yourself means you only pay for materials. Though if you're not confident in any aspect, it's worthwhile to consider help from a professional for that part only.

Commonly Asked Questions

Q: Do I need a permit to build a lean-to shed?

A: Permit requirements vary depending on your location. Check with your local building department before starting the project. Small, simple lean-tos might not require a permit, but it's best to be sure.

Q: How long does it take to build a lean-to shed?

A: A weekend is possible for a small shed, but it depends on your experience and the complexity of your design. Allow ample time for each step and don't rush the process.

Q: What kind of foundation do I need?

A: A simple frame made of pressure-treated lumber is usually sufficient. For uneven ground, you may need to adjust the frame height or use concrete footings.

Q: How can I make my lean-to shed more weatherproof?

A: Ensure proper roof overhang, use a high-quality roofing material, and seal any gaps or cracks. Consider adding weather stripping around the door.

Q: Can I build a lean-to shed against a brick wall?

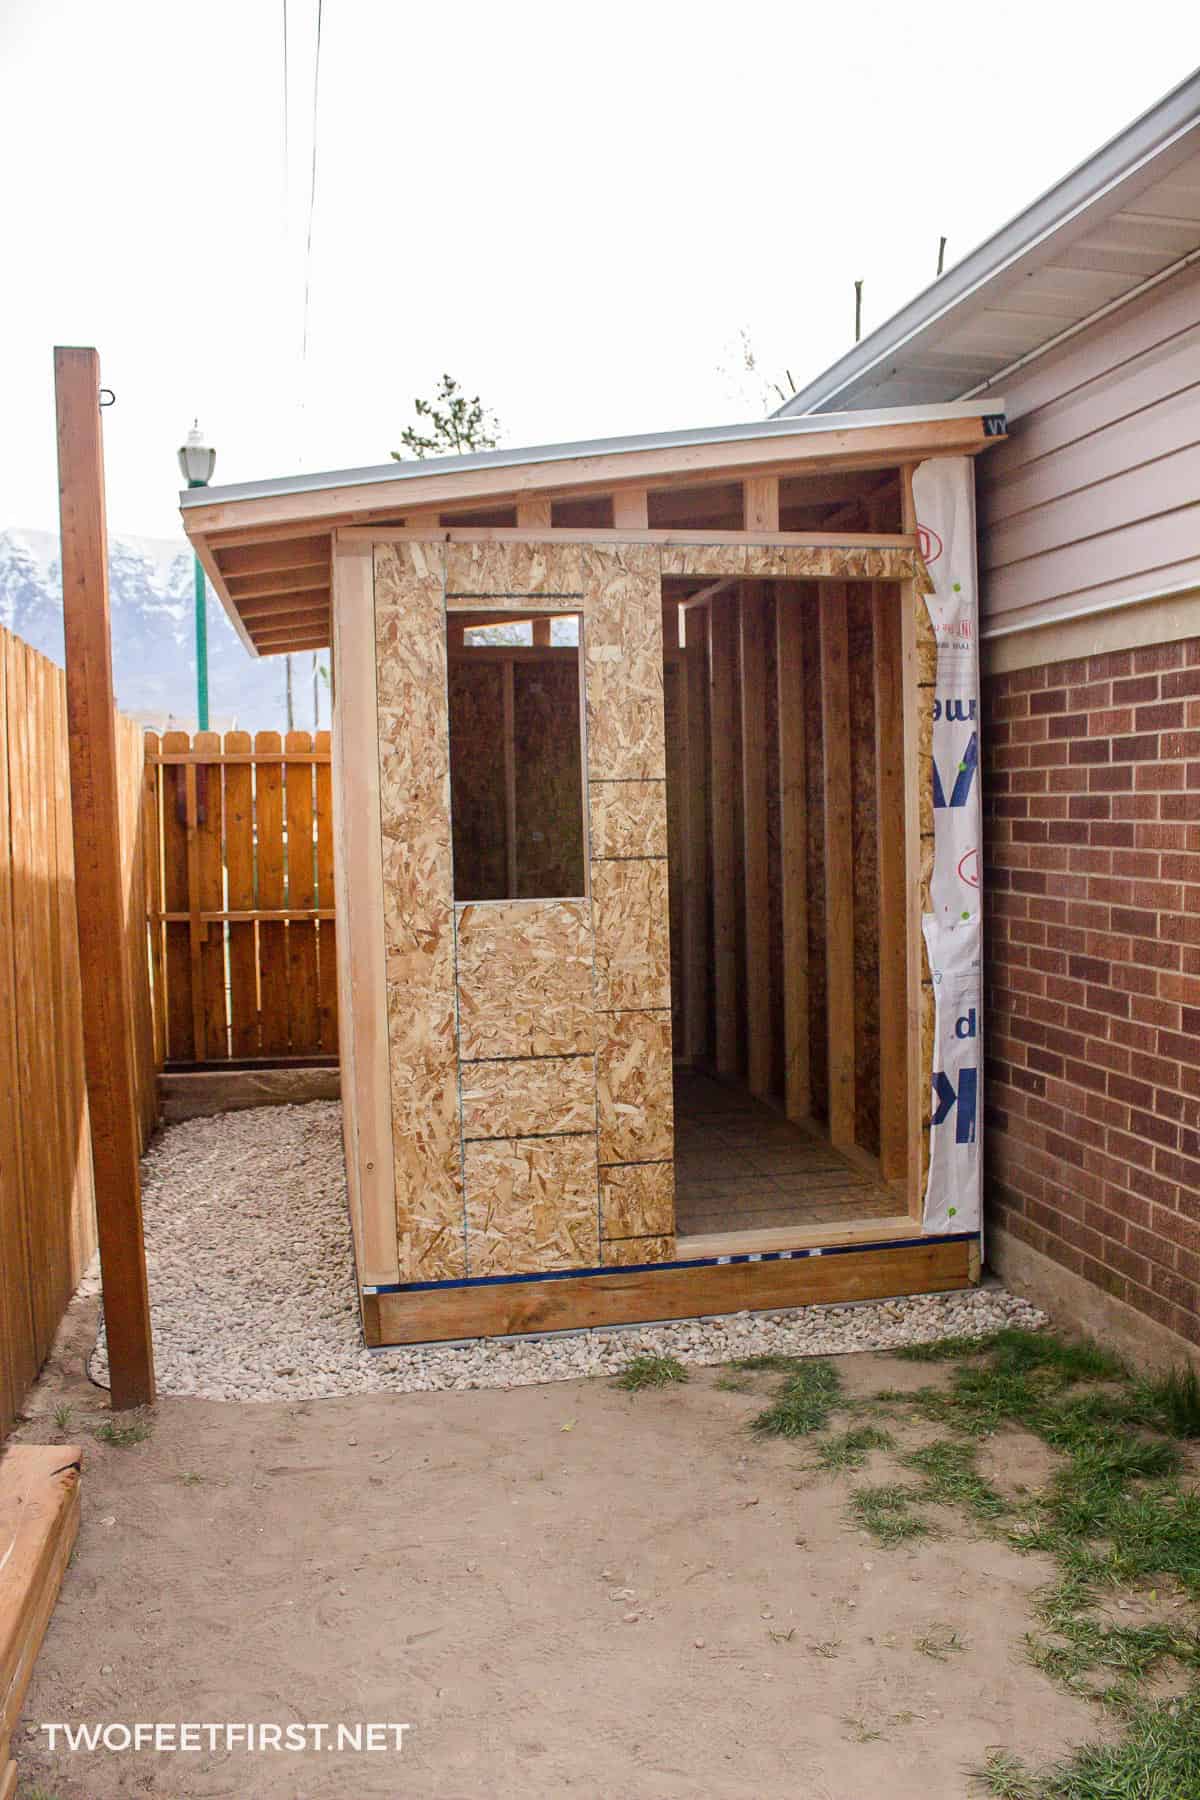
A: Yes, but ensure the wall is sturdy enough to support the weight of the shed. You might need to use additional bracing or anchors to secure the shed to the wall.

Building a lean-to shed can be a rewarding experience. It's a practical project that can add value to your property and boost your DIY confidence. So grab your tools, gather your materials, and let the building begin! Remember to enjoy the process â€" it’s as much about the journey as the destination!