


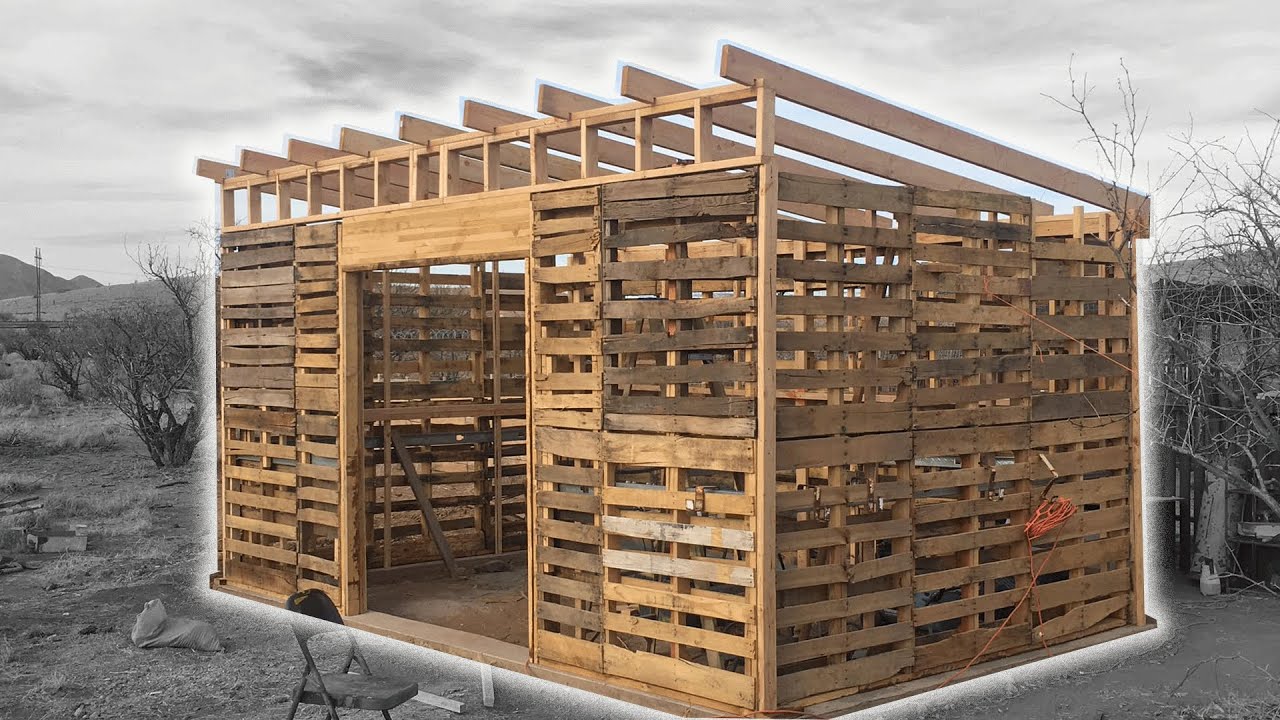
DIY Pallet Shed Plans for Quick and Easy Backyard Construction
The allure of a functional yet aesthetically pleasing backyard shed is undeniable. However, the cost of professionally constructed sheds can be prohibitive. This comprehensive guide offers detailed plans for constructing a robust and attractive shed using reclaimed pallets, minimizing cost and environmental impact while maximizing practicality and ease of construction. This project is suitable for individuals with basic DIY skills and readily available tools.
Phase 1: Planning and Preparation
Before embarking on any construction project, meticulous planning is paramount. This phase involves defining the shed's dimensions, sourcing materials, and securing necessary permits (if required by local regulations).
1.1 Defining Shed Dimensions and Functionality
The first step involves determining the desired dimensions of your pallet shed. Consider the intended use â€" storage of gardening tools, bicycles, or other equipment. A smaller shed (e.g., 6ft x 4ft) may suffice for limited storage, while larger structures (e.g., 8ft x 8ft or larger) offer greater capacity. Remember to factor in the size of the pallets you intend to utilize; pallet dimensions vary significantly. Accurate measurements are crucial for efficient material planning and construction.
1.2 Sourcing and Assessing Pallets
The foundation of this project rests on the availability of suitable pallets. Source pallets responsibly. Avoid pallets that show signs of significant damage, rot, or pest infestation. Inspect each pallet for broken slats, loose nails, and any potential structural weaknesses. Prioritize heat-treated pallets (marked with HT or ISPM15) as these are less likely to harbor pests. Determine the number of pallets needed based on your shed's dimensions and the structural requirements outlined later in the plan.
1.3 Essential Tools and Materials
Before commencing construction, assemble the necessary tools and materials. This comprehensive list ensures a smooth and efficient building process:
- Reclaimed pallets (sufficient quantity based on shed dimensions)
- Measuring tape and level
- Hammer and claw hammer
- Screwdriver (or drill with screwdriver bits)
- Safety glasses and work gloves
- Circular saw or hand saw (for cutting pallets)
- Safety glasses and ear protection
- Post hole digger or auger (for foundation)
- Concrete mix (for foundation â€" optional)
- Wood screws (exterior grade, various lengths)
- Nails (various sizes)
- Wood preservative and sealant
- Roofing felt or other suitable roofing material
- Optional: Hinges, latch, and other hardware for the door
Phase 2: Foundation and Base Construction
A sturdy foundation is critical for a long-lasting shed. While a simple base may suffice for smaller sheds, larger structures benefit from a more robust foundation.
2.1 Preparing the Site
Choose a level area for your shed, ensuring sufficient space for construction and access. Clear the area of debris, vegetation, and any obstructions. Mark out the dimensions of your shed's base using stakes and string.
2.2 Building the Foundation
There are several foundation options: a simple gravel base, concrete blocks, or a poured concrete slab. A gravel base is the easiest and cheapest but may not offer optimal stability. For a more robust foundation, consider using concrete blocks or pouring a concrete slab. The choice depends on the size and weight of the shed and the ground conditions. Ensure the foundation is level before proceeding with the wall construction.
2.3 Assembling the Base Frame
Construct the base frame using sturdy pallets or individual pallet planks. This frame serves as the base for the shed's walls and provides added stability. Ensure the frame is square and level, making necessary adjustments as needed. Secure the frame using wood screws or nails. Consider pre-treating the wood with a preservative to protect against rot and insects.
Phase 3: Wall and Roof Construction
The walls and roof form the structure of the shed. Careful planning and precise assembly are crucial for ensuring stability and weather resistance.
3.1 Erecting the Walls
Assemble the walls using reclaimed pallets. Ideally, arrange the pallets vertically to maximize strength. Secure the pallets to the base frame using wood screws. Ensure vertical alignment and stability. Use additional bracing or supports where necessary, particularly at corners and other stress points. Consider reinforcing weak areas of the pallets with additional wood or metal brackets.
3.2 Constructing the Roof
The roof design can be simple, using a gable or shed roof style. A gable roof (triangular) offers better water runoff, while a shed roof (sloping) is easier to construct. For a gable roof, construct two triangular frames using sturdy pallet wood or other suitable lumber. For a shed roof, construct a single sloping frame. Cover the roof frame with roofing felt or other suitable roofing material to ensure waterproofing.
3.3 Adding Doors and Windows (Optional)
If desired, incorporate a door and/or windows into your shed design. This requires careful planning and accurate measurements. Use sturdy wood for the door frame and ensure the door hinges and latch mechanism are securely attached. Windows can be added using reclaimed window frames or by cutting openings in the pallets and installing plexiglass or other suitable glazing material.
Phase 4: Finishing Touches and Maintenance
Once the structure is complete, focus on finishing touches and long-term maintenance.
4.1 Sealing and Finishing
Apply a wood preservative and sealant to protect the wood from moisture, insects, and UV degradation. This step enhances the lifespan of the shed and improves its aesthetic appeal. Allow sufficient drying time before storing items inside.
4.2 Regular Maintenance
Regular maintenance is crucial for the longevity of your pallet shed. Inspect the structure periodically for signs of damage or deterioration. Repair or replace damaged components promptly. Clean the shed regularly to remove debris and prevent moisture buildup. Reapply the sealant as needed to maintain protection against the elements.
Building a DIY pallet shed is a rewarding project that allows for creativity and customization. While this guide provides a detailed framework, remember to adapt the plans to your specific needs and resources. Safety should remain your paramount concern throughout the project. Always use appropriate safety equipment and follow best practices for safe woodworking.
0 comments:
Post a Comment
Note: Only a member of this blog may post a comment.