


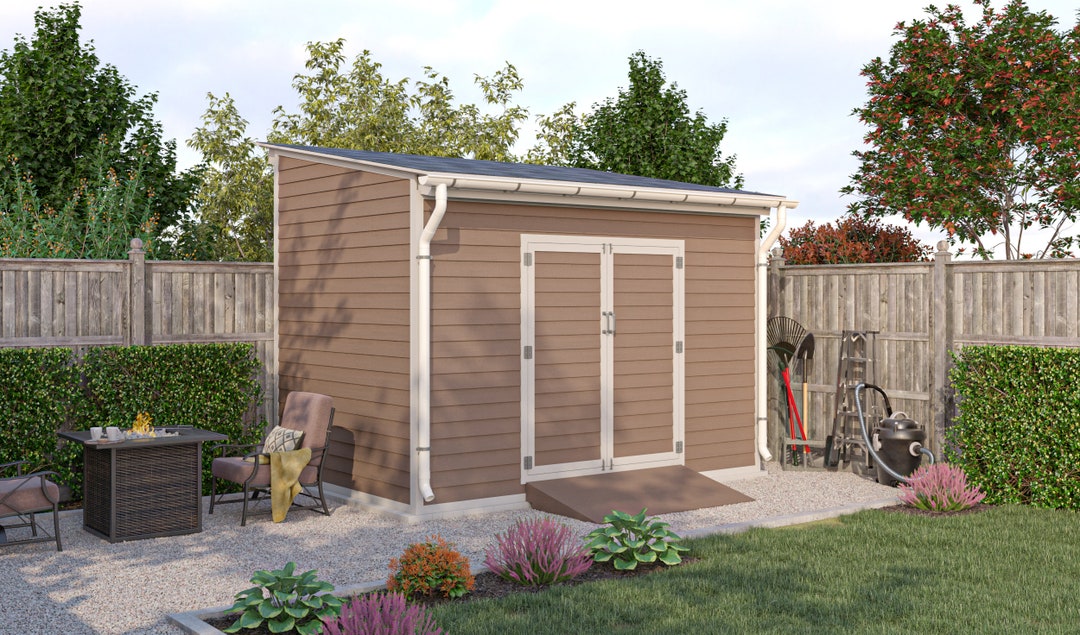
Practical 8x12 Lean-To Shed Plans for Garden Storage
This document provides comprehensive plans for constructing an 8x12 lean-to shed, ideal for garden storage and equipment. The design prioritizes practicality, affordability, and ease of construction, suitable for DIY enthusiasts with basic carpentry skills. The detailed specifications outlined below will guide you through each stage of the building process, from foundation preparation to final finishing. Careful adherence to these plans will result in a durable and aesthetically pleasing structure capable of providing years of reliable service.
I. Foundation and Site Preparation
A solid foundation is crucial for the longevity and stability of any shed. The lean-to design, while simpler than freestanding structures, still requires careful site preparation and a robust base.
A. Site Selection and Leveling
Choose a level area, preferably near the house or existing structure to which the shed will be attached. Ensure the selected location receives adequate drainage to prevent water accumulation around the shed’s base. Use a level and string line to accurately determine the high and low points of the chosen area. Excavate and compact the soil as needed to achieve a perfectly level surface. Consider adding a layer of gravel for improved drainage and stability.
B. Foundation Construction
For an 8x12 lean-to shed, a concrete slab foundation offers the best stability and longevity. This involves excavating a trench approximately 4 inches deep across the shed’s footprint. A compacted gravel base, approximately 2 inches thick, should be laid within the trench to ensure proper drainage. Construct forms using treated lumber to contain the concrete pour. Reinforce the concrete with wire mesh for increased strength. Pour the concrete, ensuring it's level and adequately compacted. Allow the concrete to cure completely (at least 7 days) before proceeding to the next stage.
Alternative: A compacted gravel base, while less robust than concrete, can be a suitable alternative in certain situations. This option requires a thicker layer of compacted gravel (at least 6 inches) to ensure adequate support. Consider using landscaping fabric underneath the gravel to prevent weed growth.
II. Frame Construction
The frame forms the skeletal structure of the shed. Precise measurements and careful assembly are critical for ensuring the shed's structural integrity and squareness.
A. Material Selection
Utilize pressure-treated lumber for the frame and base to withstand the elements. Choose dimensions based on local building codes and your desired strength; however, 4x4 posts and 2x6 for framing are generally suitable. For roofing, consider using plywood sheathing and appropriate roofing material (e.g., asphalt shingles).
B. Frame Assembly - Construct the floor frame using 2x6 lumber, ensuring it’s square and level on the foundation.
- Erect the main side walls, attaching them securely to the floor frame and the existing structure. Use appropriate connectors for optimal strength and stability.
- Install the rear wall, making sure it’s plumb and aligned with the side walls. Ensure proper connections are made using appropriate fasteners.
- Build the roof frame, ensuring appropriate rafter spacing (typically 16 inches on center). The roof pitch should be sufficient for adequate water runoff.
- Securely connect the roof frame to the side and rear walls, paying close attention to bracing for strength and stability against wind load.
III. Sheathing and Roofing
Sheathing provides a solid base for the roofing material and also contributes to the overall structural strength of the shed.
A. Wall Sheathing
Apply plywood sheathing to the exterior walls, ensuring proper overlap and fastening to the framing. Consider using exterior-grade plywood for water resistance. Leave gaps for ventilation to prevent moisture buildup.
B. Roof Sheathing
Install plywood sheathing to the roof rafters, again ensuring proper overlap and secure fastening. The sheathing should be adequately braced to support the weight of the roofing material. Check local building codes for minimum requirements for wind and snow load.
C. Roofing Installation
Install your chosen roofing material, following the manufacturer's instructions. Asphalt shingles are a common and cost-effective option. Ensure proper underlayment is used to prevent leaks. Pay close attention to flashing around the edges and any penetrations.
IV. Doors and Windows
Doors and windows provide access and ventilation for your shed.
A. Door Installation
Install a sturdy exterior door appropriate for the shed's size and your needs. Ensure the door frame is properly aligned and securely fastened. Use weatherstripping to ensure a tight seal.
B. Window Installation (Optional)
Installing windows can improve ventilation and light within the shed. Select windows appropriate for exterior use and install them following manufacturer's instructions, ensuring proper sealing and weatherproofing.
V. Finishing Touches
Final finishing touches enhance the shed’s aesthetics and durability.
A. Exterior Finishing
Apply an exterior-grade paint or sealant to protect the wood from the elements. Choose a color that complements your home and landscaping.
B. Interior Finishing
Consider adding shelving and other storage solutions to maximize the shed's interior space. Paint the interior walls for a clean and organized appearance. Proper ventilation inside will also prevent moisture damage.
C. Safety Considerations
Always prioritize safety during the entire construction process. Use appropriate safety equipment, including eye protection, gloves, and hearing protection. Follow all safety guidelines when working with power tools and handling materials.
This detailed plan provides a comprehensive guide for constructing an 8x12 lean-to shed. Remember to always check local building codes and regulations before starting any construction project. With careful planning and execution, you can create a durable and functional storage solution for your gardening needs. Enjoy the process and the rewards of a job well done!
0 comments:
Post a Comment
Note: Only a member of this blog may post a comment.